Edit PDF Documents Part One: How to use Adobe Acrobat to edit a PDF file
Design studios often have to edit PDF documents in order to alter a document created by someone else, or to make a last minute change without having to return to the source files. This page explains how to make simple changes to text and objects using Adobe Acrobat. Please note that you can't edit a PDF file with the free Adobe Reader - you need the full version of Adobe Acrobat to make changes.
If you're using Adobe Acrobat 9 or earlier, the changes you'll be able to make will be extremely limited. The 'Advanced Editing' text tools are unwieldy to say the least. However, if you just want to make minor tweaks, see Simple PDF Editing with Acrobat below to find out how.
Advanced PDF Editing with Acrobat X Pro (or Standard)
If you want to make more advanced changes to the content and layout of a PDF file, including text editing, image cropping and repositioning, there are two main ways to do it:
- One method to better edit PDF documents is to use Adobe Acrobat X Pro (Pro or Standard) which is a significant improvement over its predecessors when it comes to advanced editing tools. No longer consigned to an obscure sub-menu, the improved advanced editing tools make a much better job of text editing and repositioning (the text actually wraps now!), and you can even crop individual images on a page, and even change color modes for individual items.
- Another method of advanced editing (if you don't possess Adobe Acrobat X) is by using a combination of (older) Acrobat, Illustrator and Photoshop. If you have the full suite of Adobe software, go to the tutorial on How to Edit PDF Documents Part Two: Using Adobe Creative Suite to edit PDF files.
Demo of Acrobat X Pro Editing Tools - edit PDF documents with more control
The best way to demonstrate the editing capabilities of Acrobat X is to view the video below from AdobeTV which gives a broad overview of the features available. Links to the software for more information are below the video.
- Adobe Acrobat X Pro - this includes just Acrobat X Pro, but with all the editing functionality
Simple PDF Editing with Acrobat 9 (or earlier)
If all you need to do is tweak the odd word or nudge the odd element, here's how to edit PDF documents with older versions of Acrobat.
This is an example of a simple business card created (and opened) in Adobe InDesign. All the elements on the page have been selected to give you an idea of how it is constructed. The logo (top left) is an Illustrator EPS file with the text converted to outlines. The image on the right is a 300 DPI CMYK TIFF file saved in Photoshop, and the remaining text has been placed in two separate text boxes. The red and yellow background boxes and white lines have been created and placed in InDesign. In short, this is a fairly typical, simple layout.

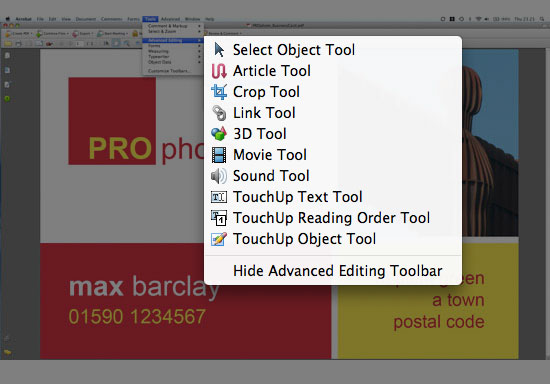
When you've created a PDF file from your layout (see Business Card Layout Design and PDFX1a Creation), open it in Acrobat. Select TOOLS/ADVANCED EDITING and you'll see a list of tools (as shown below). The ones I usually tend to use to edit PDF documents are TOUCHUP TEXT TOOL and TOUCHUP OBJECT TOOL, so these are the ones I'll focus on. Before I get into them, however, I will just mention the CROP TOOL.
Edit PDF Documents
Using the Acrobat CROP TOOL
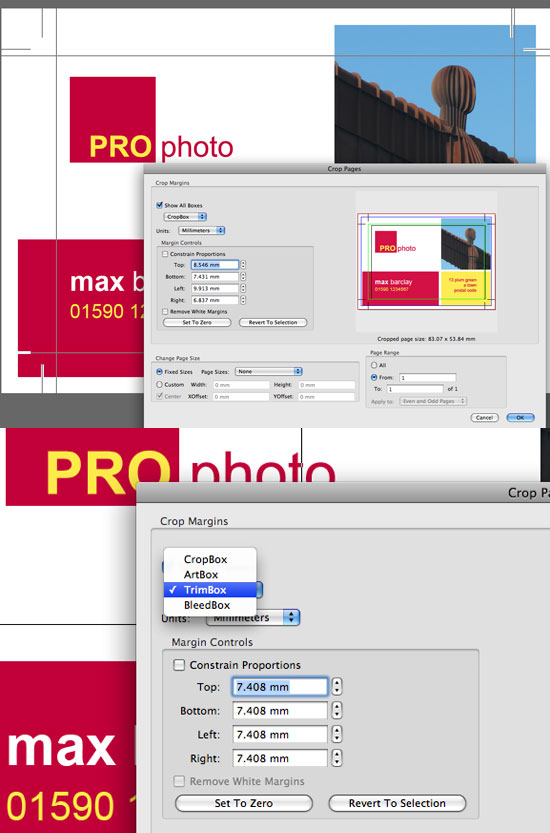
I often have to trim a PDF file which contains crop marks and bleed. If I want to send it as a proof without the marks, and trimmed to the edge, instead of creating a new PDF document from InDesign or Quark XPress, I go straight to Acrobat. Once the file is open, select the CROP TOOL. Drag a small rectangle anywhere on the PDF document page and then double-click inside it. The Crop Pages Dialogue Box will open showing the precise position of the crop box you have just created.
From the drop-down menu in the top left corner, select TrimBox. Watch the Margin Controls values and you'll see them change to the position and size of the crop box that would be required to trim the page to its finished size. You can check its accuracy by looking at the Cropped Page Size values underneath the preview image.
Make a note of (or copy) the Margin Control values and select CropBox from the menu. Please note - just clicking OK with TrimBox selected will not actually crop the file - you need to revert to CropBox first. Once there, enter (or paste) the trim values into the Margin Controls fields. In the Page Range area, select All or From... depending on how many pages there are in the PDF file that need to be cropped, and click OK. The file will crop perfectly to the crop marks.
Edit PDF Documents
Using the TOUCHUP TEXT TOOL to edit a PDF file
If you select the TOUCHUP OBJECT TOOL and drag around the page (in the same way that you would to select all items in InDesign) you'll see that all the elements are in separate bounding boxes, just as they were in InDesign. You can treat them in much the same way as well - you can use the TOUCHUP OBJECT TOOL to move things around and scale them, and the TOUCHUP TEXT TOOL to make (very simple) text changes.
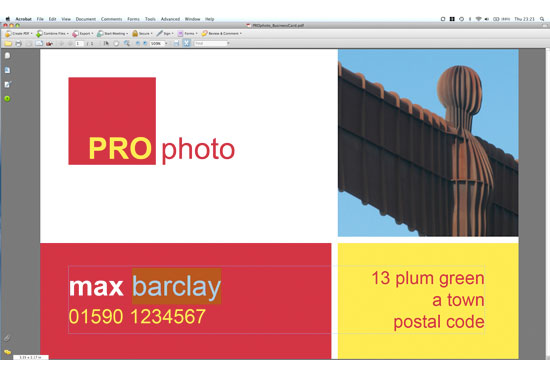
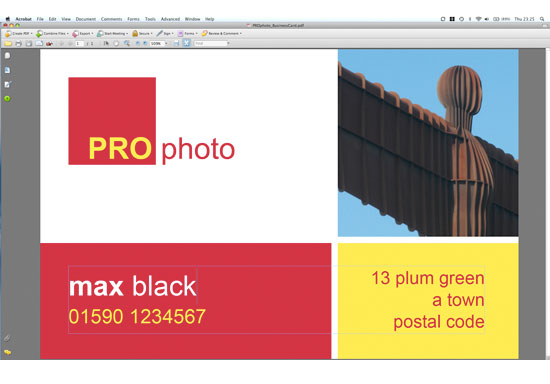
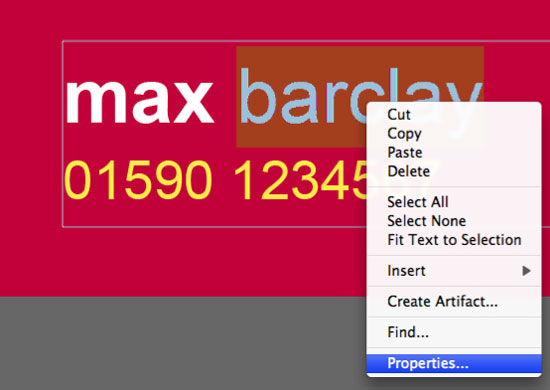
For example, after selecting the TOUCHUP TEXT TOOL I clicked on the barclay text as shown above. You have to be patient whilst Acrobat goes through the process of 'Loading System Fonts'. Once it's finished you can select and edit the text. Below, I have changed the word barclay to the word black. If a simple edit like this is all that's required, you can then save and close the file.
If you need to find out what font the text has been styled with, or if you need to change the typeface, select the text and then right click on it. A menu will appear from which you should select PROPERTIES... This will open the Touchup Properties Dialogue Box which you can use to edit some aspects of the text:
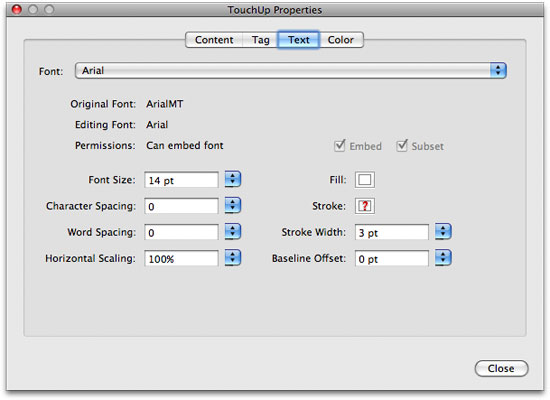
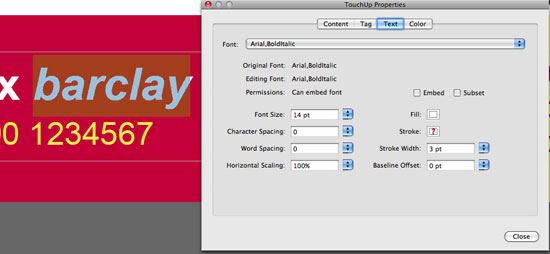
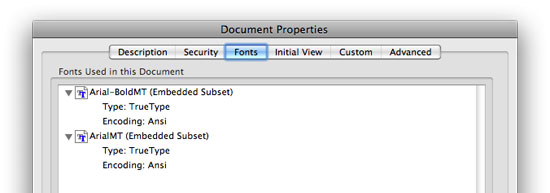
Something to remember here is that if you change the typeface to one that's not embedded within the PDF file, you'll start to get warning messages about missing and substitute fonts. You can change the font to one from your system, or it'll use a substitute font. Experiment with a few different variations and you'll soon get the hang of it. If you want to know what fonts have been embedded into the document, select FILE/PROPERTIES... A Document Properties Dialogue Box will open. Click on the Fonts tab to see which typefaces have been embedded:
This is pretty much the extent of Acrobat's capabilities when it comes to making text changes. If you need to replace a whole paragraph of text, you'll start to run into trouble. Acrobat doesn't wrap text automatically, so you'll need to add line breaks manually. Also, the text box will probably reposition itself, so you'll need the TOUCHUP OBJECT TOOL to adjust the positioning. Text alignment and tabbing are non-existent. Again, if you want to make radical changes to the content and layout of a PDF file, the best way to do it will be by using a combination of Acrobat, Illustrator, Photoshop and InDesign, depending on your requirements. If you have the full suite of Adobe software, go to step two of this tutorial - How to Edit PDF Documents Part Two: Using Adobe Creative Suite to edit PDF files.
Edit PDF Documents
Using the TOUCHUP OBJECT TOOL to edit a PDF file
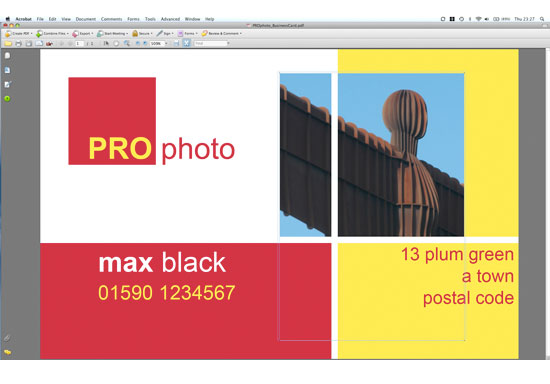
Once you've finished editing the text, you might want to make simple tweaks to the layout and images. If you select the TOUCHUP OBJECT TOOL you'll be able to move elements around the page (like the images, lines, text and background color blocks). If you position the cursor over a corner of one of the bounding boxes (or over the corner of a collection of objects), the cursor will change to a 'scale' icon and you'll be able to drag-scale the elements to different sizes. It's possible to edit these individual elements outside Acrobat, but you'll need the companion software (Photoshop and Illustrator) in order to achieve this.
Edit PDF Documents
Using the Adobe Creative Suite
If the changes you needed to make to your PDF file were simple, it's possible that this article was all that was required. However, if you need to make more comprehensive alterations, please read the second part of this article: How to Edit PDF Documents Part Two: Using Adobe Creative Suite to edit PDF files.
Resources & More Information
- Adobe Acrobat X Pro - this includes just Acrobat X Pro, but with all the editing functionality
- Return from Edit PDF Documents Part One to Home
